GitHub Actions for continuous integration and linting
Introduction
Learning GitHub Actions is documented on the GitHub site. This guide provides an overview with a practice repository.
GitHub Actions can be created in a number of ways. In this guide we use a workflow template provided on GitHub and edit it to our needs.
Create a repository on GitHub
You can apply GitHub Actions to an existing repository you have on GitHub.
Create the 'Actions' workflow using a GitHub template
Go to the Actions tab in the repository:

Find 'Python application' (not the 'Publish Python Package' workflow) and click on 'Configure'.

This automatically creates a file called python-app.yml in your repository. You can name this differently if you
wish, for example projectname.yml (replacing with the name of your project)
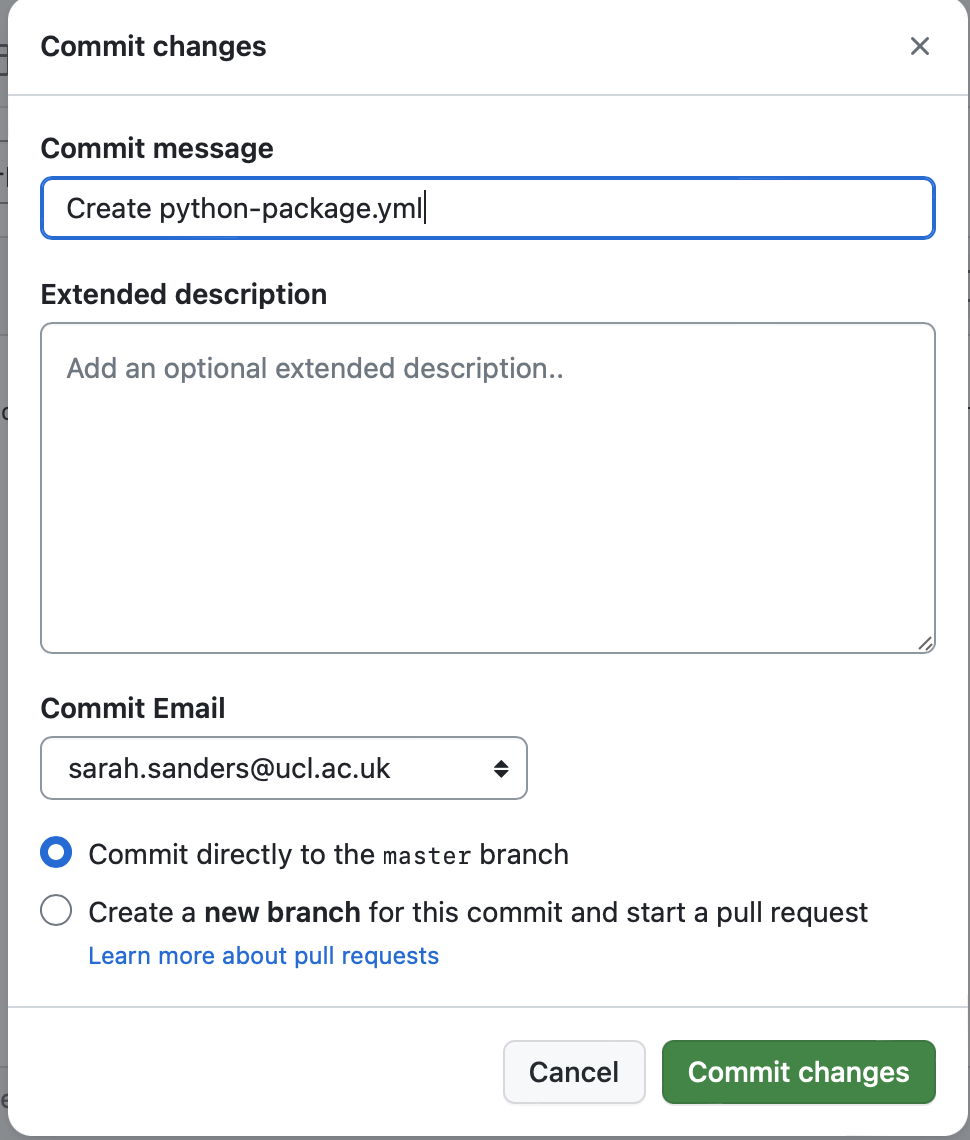
Press the green Commit button.
When prompted, select Commit changes.
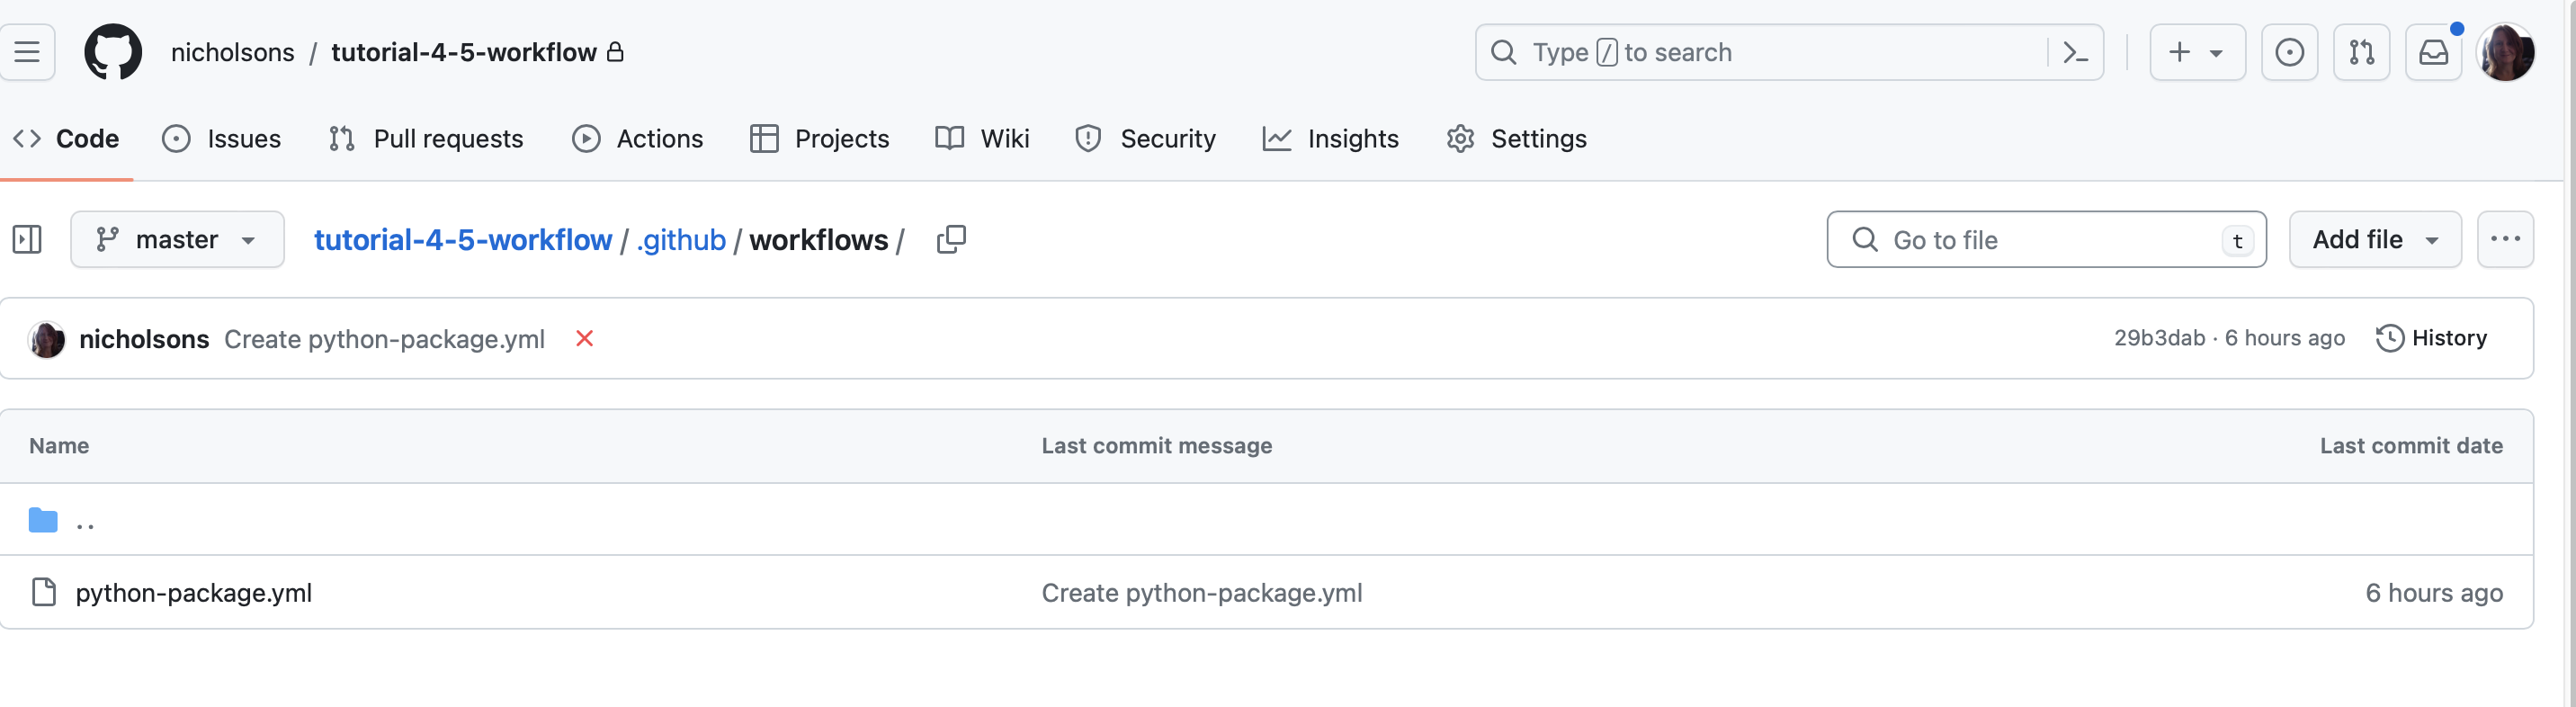
You should see the file added to the .github/workflows directory of your repository.
Modify the .yml to run pytest with coverage and a linter
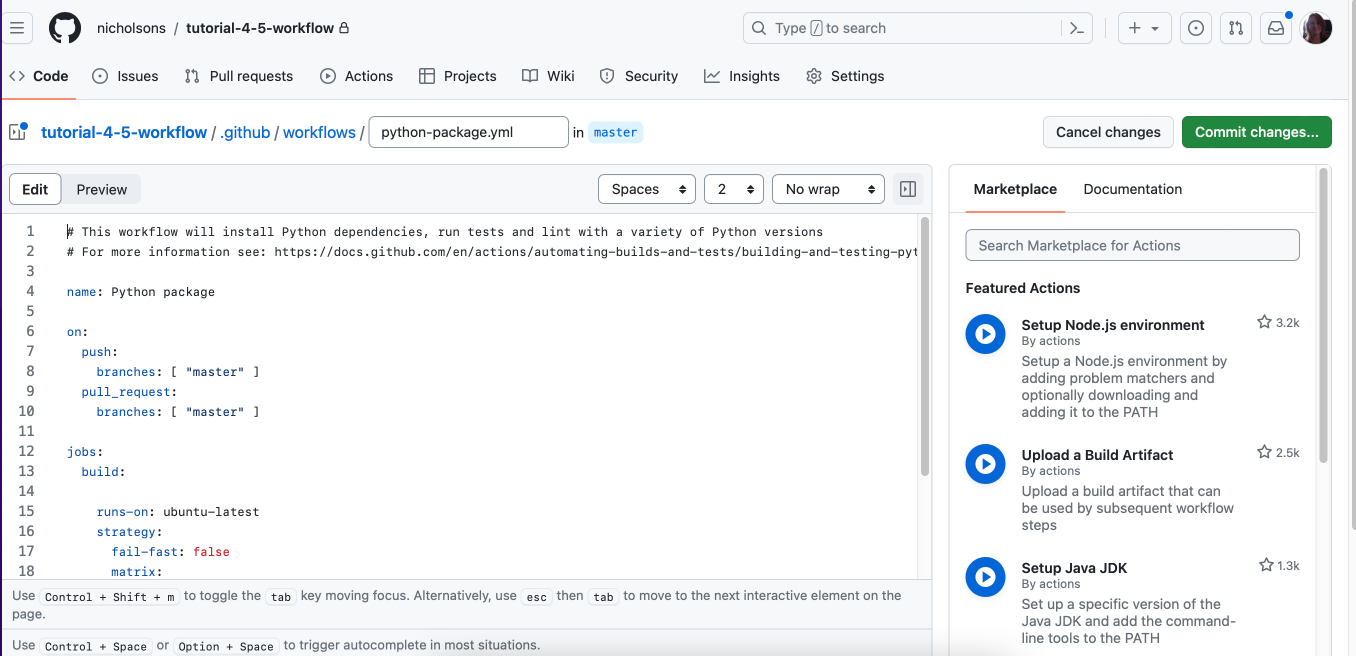
Click on the hyperlink to the .yml file and use the pencil icon to enter the edit mode.
NB: To edit the .yml in your IDE you will first need to 'pull' the changes to your local copy of the repo. The file will
be in a directory called .github/workflows/
Refer to the GitHub workflow syntax documentation that explains what each of the key words mean. The syntax is YAML, a structured text. So let’s walk through the code.
# This workflow will install Python dependencies, run tests and lint with a variety of Python versions
# For more information see: https://help.github.com/actions/language-and-framework-guides/using-python-with-github-actions
name: Python package
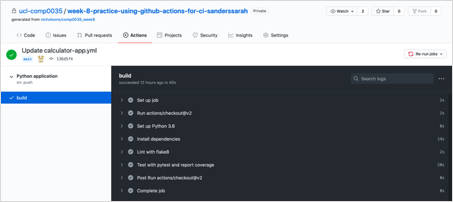
name helps you to identify the overall workflow and sections within it. The first name is for the workflow itself and is what will appear in your list of workflows seen when you click on the Actions tab in GitHub:
The names within the steps show the name of those steps. The screenshot below shows the results of one of the automated
tests, you should see in the black area that there are sections that relate to each of the step names. Make sure you use
meaningful names in your .yml!
com
on indicates when the workflow should run. In this case when there is a push to the main branch, or a pull request on the main branch.
on:
  push:
    branches: [ master ]
  pull_request:
    branches: [ master ]
The jobs section lists the actions to carry out and is further subdivided (note the indentations, these have meaning, and you will get errors if you don’t indent appropriately). The actions will run in a virtual machine on GitHub’s infrastructure. The virtual machine is ubuntu. You do not need to change runs-on for this activity, though you can see the other options in the documentation. You might change this if the server you intended to deploy on isn’t linux.
You may wish to change the Python versions to match those you are developing on.
runs-on: ubuntu-latest
  strategy:
    fail-fast: false
    matrix:
      python-version: [ "3.9", "3.10", "3.11" ]
You can have any number of steps in your job. Some parameters are optional, so for some you may see uses , name, with and run , for others you may just have 'run'.
Refer to the reference for the details of these, the following is a high level overview of what the steps do.
The first part checks out the code in your repository to use:
steps:
  - uses: actions/checkout@v3
The following sets up the version of Python to use (as specified earlier).
    - name: Set up Python $
      uses: actions/setup-python@v3
      with:
        python-version: $
The next part installs the dependencies.
    - name: Install dependencies
      run: |
        python -m pip install --upgrade pip
        python -m pip install flake8 pytest pytest-cov
        if [ -f requirements.txt ]; then pip install -r requirements.txt; fi
It first installs pip as this is what is used to install the rest of the packages.
You will need to edit the line to add pytest-cov so that we can see the extent to which the tests cover the code base.
It is then installing flake8 (we covered this in code quality, it carries out checks on the syntax of your Python code) and pytest.
It then installs all the requirements that are listed in requirements.txt. We have not yet learned the use of requirements.txt though some of you have noticed it in some repositories. This file lists the packages that are to be installed for a project e.g.,
pytest
pytest-cov
Consider adding a line to install your own code pip install -e .
Having installed the necessary dependencies it now carries out the specified tasks. The first is to use flake8 to check the code syntax.
   - name: Lint with flake8
       run: |
         # stop the build if there are Python syntax errors or undefined names
         flake8 . --count --select=E9,F63,F7,F82 --show-source --statistics
         # exit-zero treats all errors as warnings. The GitHub editor is 127 chars wide
         flake8 . --count --exit-zero --max-complexity=10 --max-line-length=127 --statistics
If there are syntax errors with your code it should fail; other errors are treated as warnings so won't cause a fail only to produce a list of the issues. You can use this list to identify smaller code quality issues that you need to be addressed.
Assuming no errors that stop the build from continuing then the next job is to run the tests using pytest.
Let's edit the code that is given so that it runs pytest runs with the verbose parameter and with coverage reporting.
    - name: Test with pytest and coverage
      run: |
        python -m  pytest --verbose --cov=src
Save and commit if working in GitHub online, or save, commit and push if working in IDE.
Troubleshooting workflows
The change that you just committed will now cause the workflow to run!
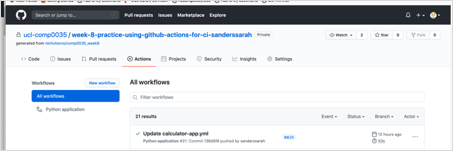
If you go to the 'Actions' tab, you should see 'All workflows'.
A yellow spinning circle means the workflow is running; a green tick indicates it ran without issues; a red cross indicates there was an error.
Click on a workflow run to expand and see the details.
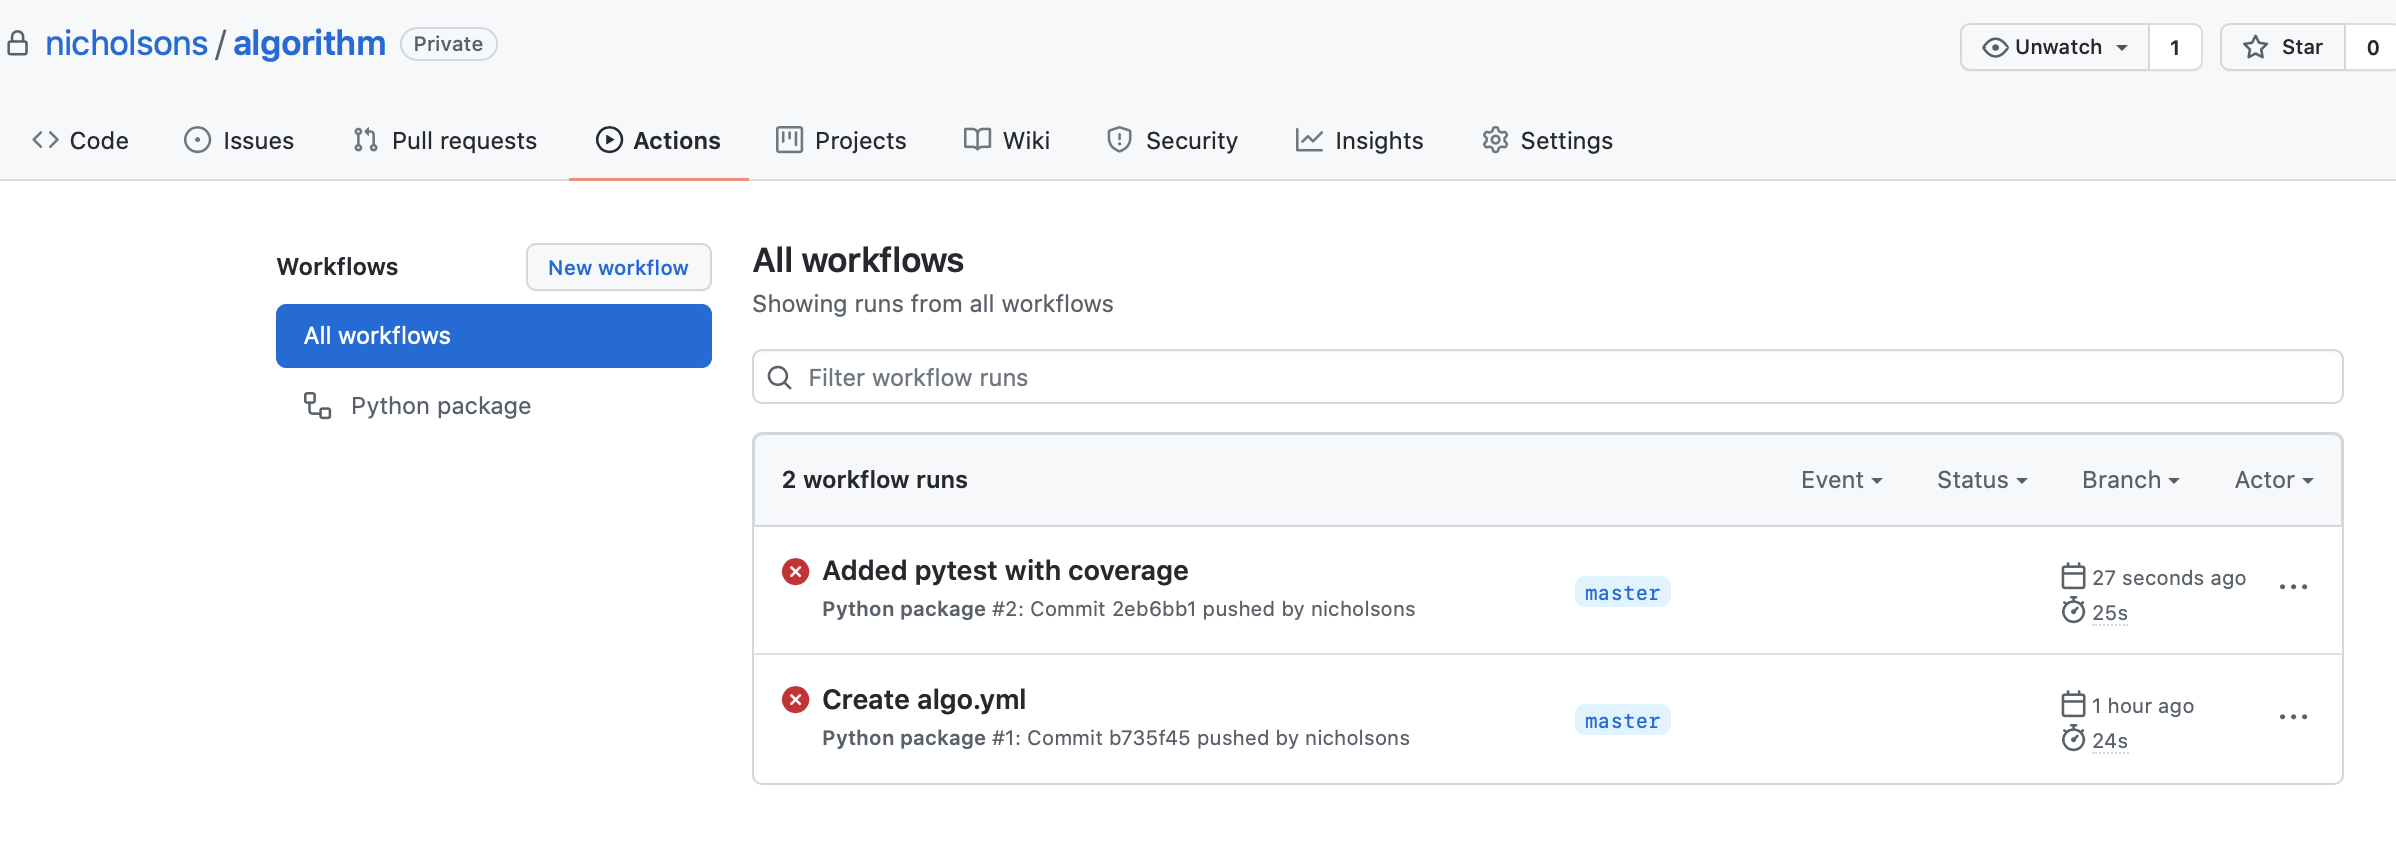
If I click to go into the build and then into one of the failed runs and expand the '>' you can see the error messages:
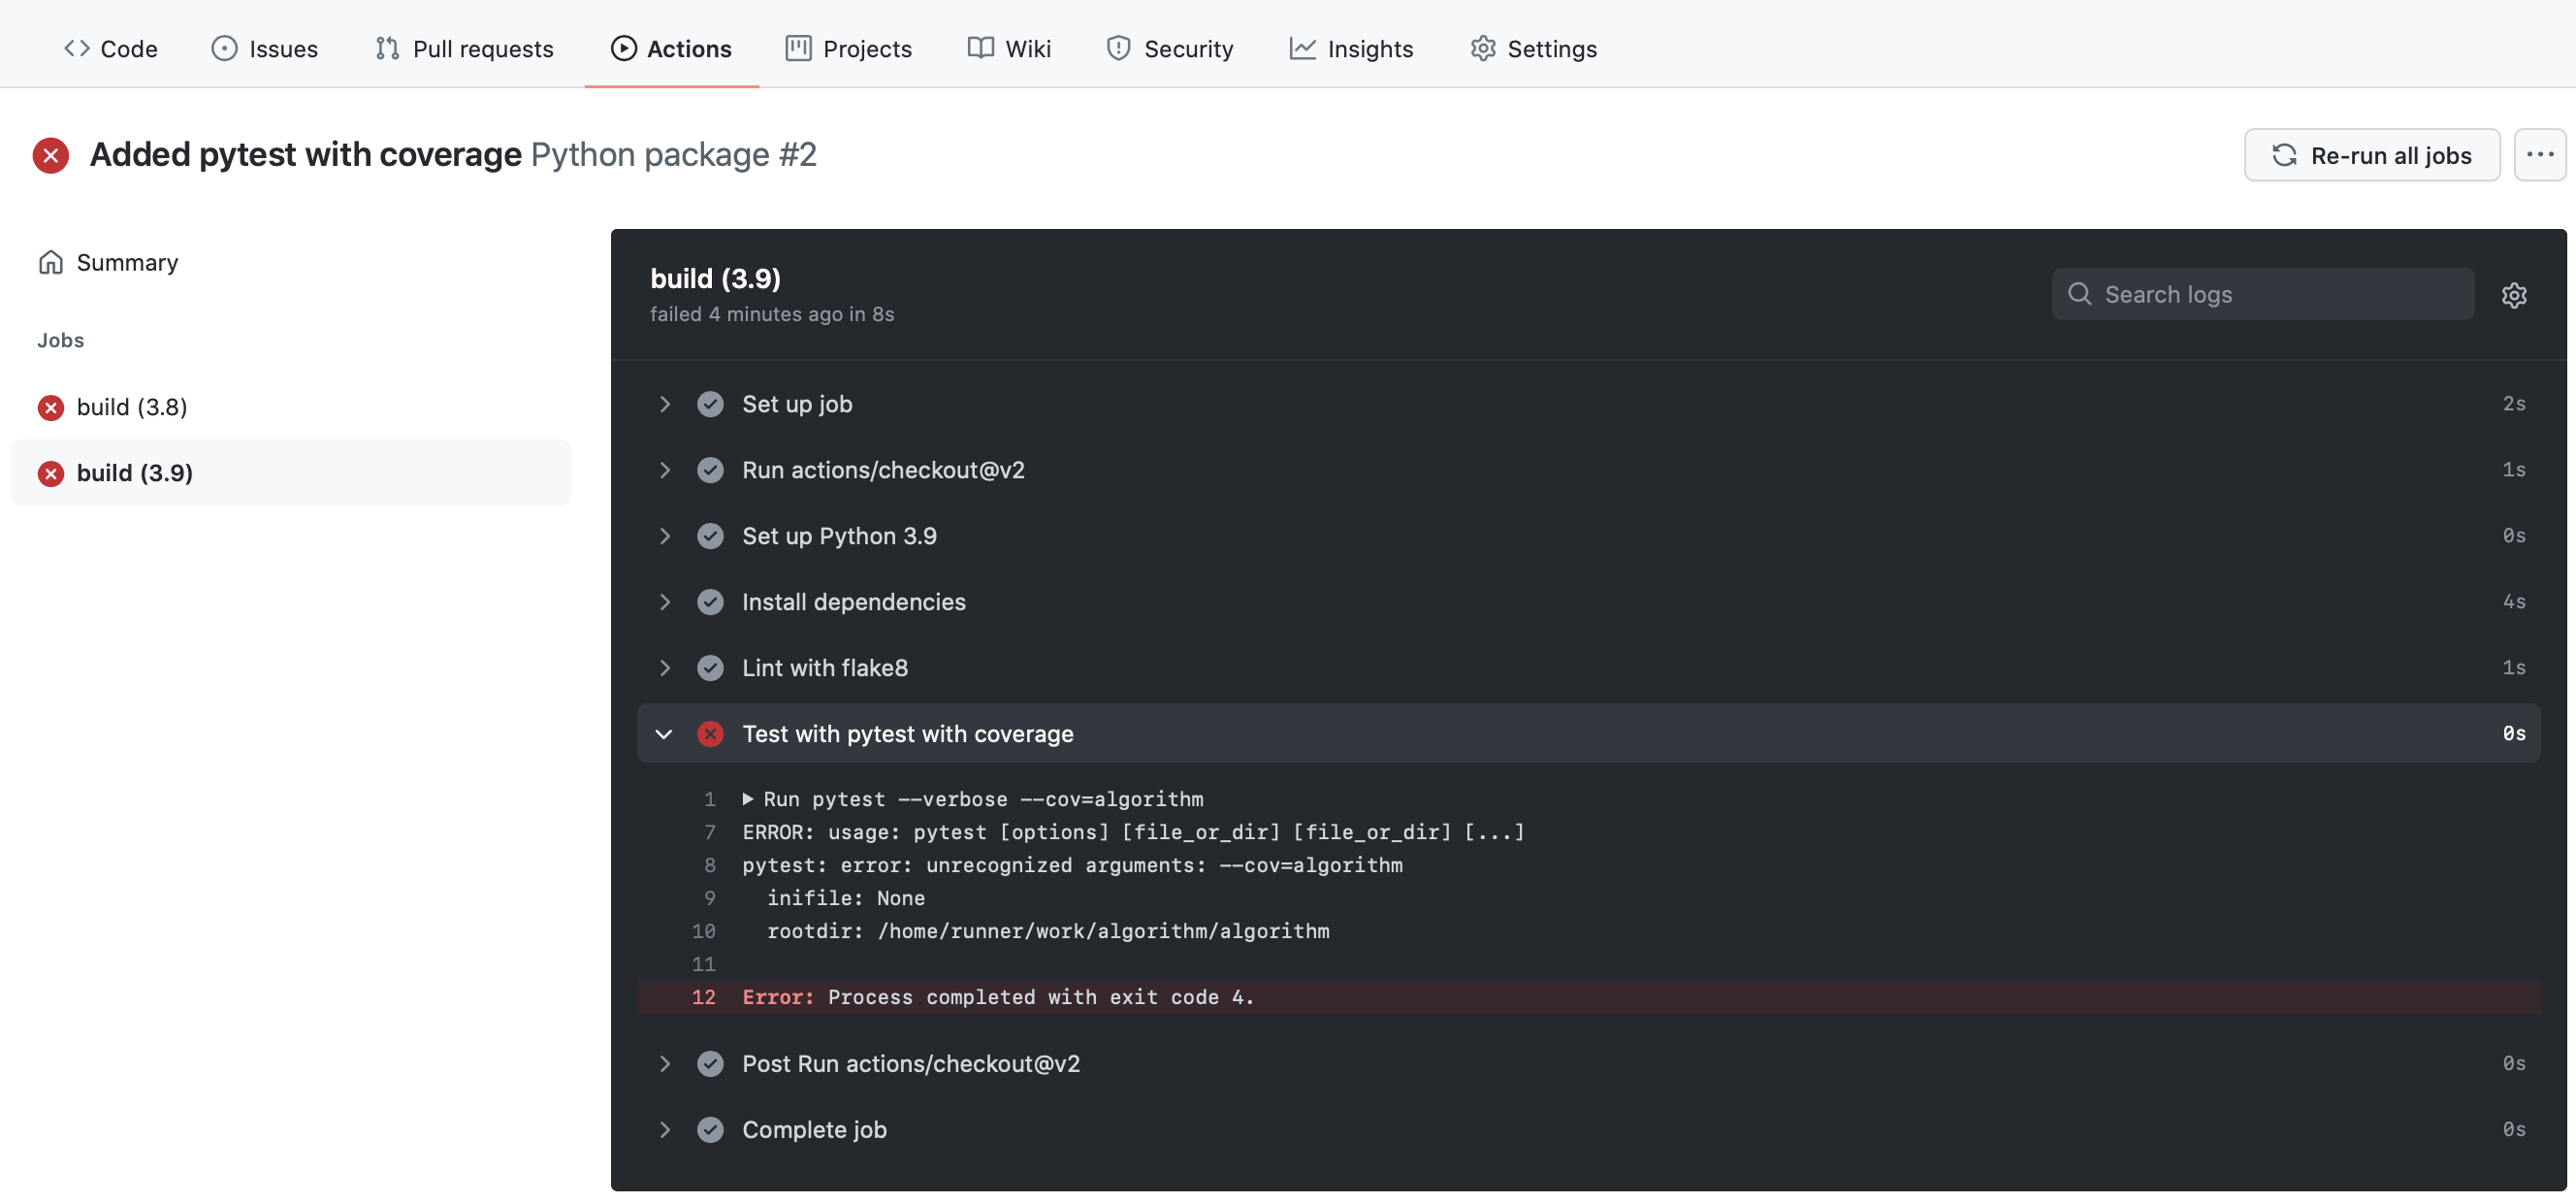
The error messages suggests it didn't understand the 'cov' argument, and I discovered I hadn't installed pytest-cov in the installation job in the .yml.
I modified the .yml to run pytest using python -m:
    - name: Test with pytest with coverage
      run: |
        python -m pytest --verbose --cov=src
Use the workflow results to improve your tests and code quality
Use the workflow results to inform and improve your code and tests.
For example, if you ran coverage then look at the results of the coverage and see where you may not have covered aspects of the code. Do you need to write more tests?
You should check the results of the flake8 lint:
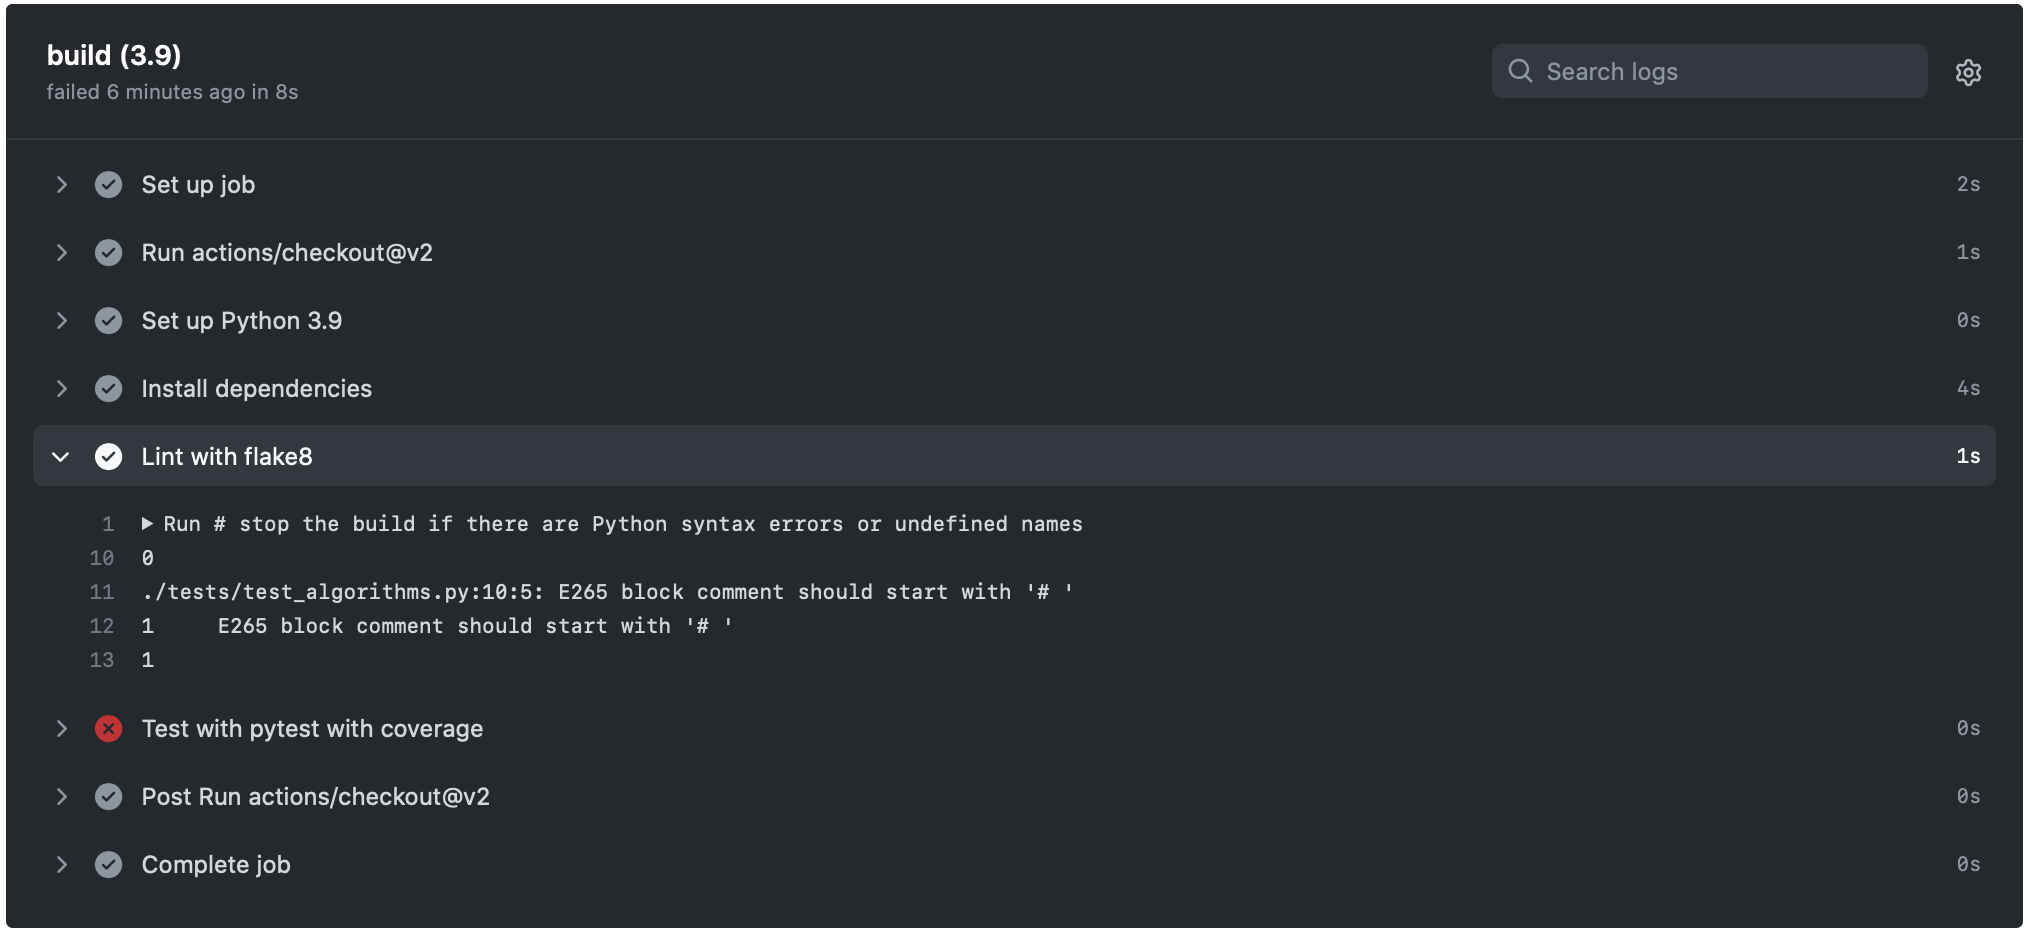
The Flake 8 rule E265 indicates there is a minor code style issue with the way that the
block comment starts on line 10 of the code file tests/test_algorithms.py. On investigation this was a line of code
that was commented out that I forgot to remove, so I deleted the whole line!
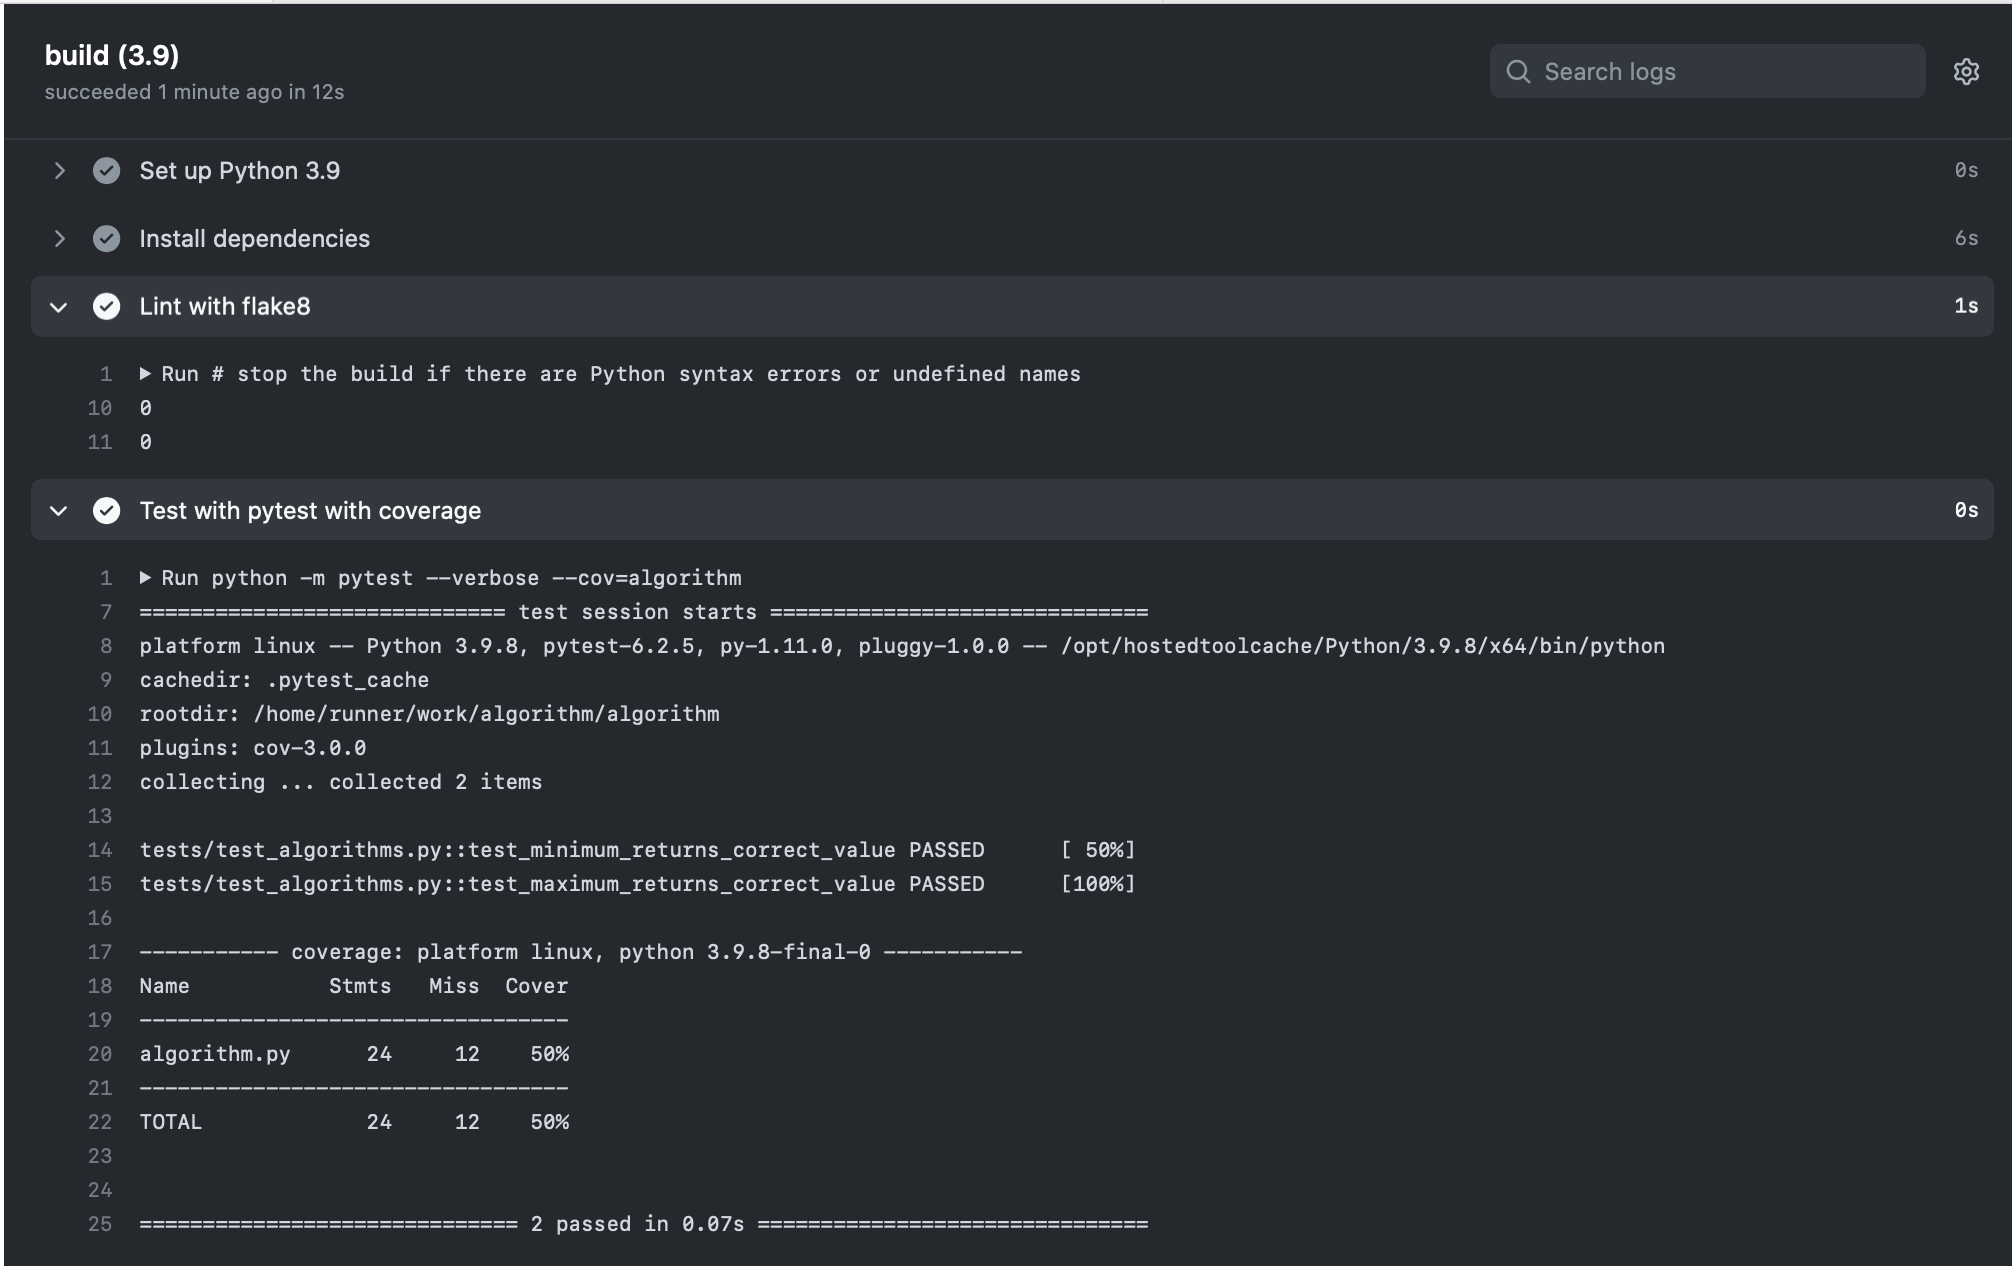
The final build report from the workflow shows the style errors corrected and the tests run and coverage is reported:
Sometimes your chosen linter my flag warnings that you don't wish to resolve. For example flake8 defaults to 79 character line length whereas some IDEs have a longer default than this so you may get line length warnings (or you can either change your IDE line length or read the flake8 documentation for how to change the flake8 settings to a longer line length). Other times you may have warnings that a function is too long or complex, and on analysing the function you might decide there isn't a way to refactor it to reduce the length or complexity.
For your coursework you are expected to have corrected issues reported through linting so if you decide not to address
these then please briefly explain your reasons in the coursework README.md.
Appendix 1: Full workflow .yml file
# This workflow will install Python dependencies, run tests and lint with a variety of Python versions
# For more information see: https://docs.github.com/en/actions/automating-builds-and-tests/building-and-testing-python

name: Python package

on:
  push:
    branches: [ "master" ]
  pull_request:
    branches: [ "master" ]

jobs:
  build:

    runs-on: ubuntu-latest
    strategy:
      fail-fast: false
      matrix:
        python-version: ["3.9", "3.10", "3.11"]

    steps:
    - uses: actions/checkout@v3
    - name: Set up Python $
      uses: actions/setup-python@v3
      with:
        python-version: $
    - name: Install dependencies
      run: |
        python -m pip install --upgrade pip
        python -m pip install flake8 pytest
        pip install -e .
        if [ -f requirements.txt ]; then pip install -r requirements.txt; fi
    - name: Lint with flake8
      run: |
        # stop the build if there are Python syntax errors or undefined names
        flake8 . --count --select=E9,F63,F7,F82 --show-source --statistics
        # exit-zero treats all errors as warnings. The GitHub editor is 127 chars wide
        flake8 . --count --exit-zero --max-complexity=10 --max-line-length=127 --statistics
    - name: Test with pytest
      run: |
        python -m pytest --verbose --cov=src
Further information
Please refer to the reading list.